Skip to content


Christmas cookie painting means decorating sugar cookies with edible paint made from food coloring mixed into an egg white wash, a thin icing, or an extract. You paint the designs with a clean brush, let them dry, and eat the cookies. One batch of 24 painted sugar cookies takes 20 minutes of prep and 10 minutes in the oven.
Painting cookies sits between baking and craft time. The cookies come out of the oven first, or the paint goes on before baking, and then everyone gathers around the table with brushes. Kids get a real job to do, and adults get cookies that look hand made without piping skills.
This guide gives you one complete recipe, then the four paint methods compared, drying times, designs by skill level, and fixes for the usual mistakes. Every amount and time comes from a named source.
What Christmas cookie painting is
Christmas cookie painting is a decorating method, not a cookie flavor. You start with a flat cut-out sugar cookie, then you paint the surface with color that is safe to eat. The paint can be an egg white wash, a thin icing, a mix of extract and food coloring, or sweetened condensed milk with gel coloring.
Two of the methods paint before baking. The egg white wash and the egg yolk paint go onto raw cookies, and the oven sets the color as the cookies bake. The other two paint after baking, onto a cooled cookie or a dried icing base.
The result looks like a watercolor. Egg wash paint gives soft, pale color that sinks into the cookie. Icing paint gives stronger color that sits on top. Pick the method that matches the look you want, then follow the drying time for that method.

Christmas cookie painting at a glance
The table compares the four paint methods, so you can pick one before you shop. Times are for the paint step only, not the cookie bake.
| Paint method | Paint base | Paint before or after baking | Drying time | Best for |
|---|---|---|---|---|
| Egg white wash | Egg whites, water, food coloring | Before baking | Sets in the oven | Lead recipe, kids, soft watercolor look |
| Thin icing paint | Powdered sugar, corn syrup, milk, food coloring | After baking | About 1 hour to set | Bright color, squeeze bottles, groups |
| Extract flavor paint | Vanilla or lemon extract, food coloring | After baking, on dried frosting | About 10 minutes for the frosting base | Strong color, scented paint |
| Condensed milk paint | Sweetened condensed milk, gel coloring | After baking | Stays soft, same day | Toddlers, quick crafts, no baking step |
Painted sugar cookies
Prep time: 20 minutes, plus 1 hour chilling for the dough
Cook time: 10 minutes
Serves: 24 cookies
Why this recipe leads the guide
This recipe leads because it uses the whole egg and needs no extra drying wait. The yolks go into the dough, the whites become the paint, and the paint sets while the cookies bake. Small Town Scratch gives the full amounts, the calorie figure, and the storage times, so nothing is left to guess.
The sour cream is the quiet difference in this dough. It keeps the cookies soft after baking, which matters when painted cookies sit out on a party table. A dry cookie cracks when a child presses a brush onto it, and this dough holds up better.
The cookie itself is a plain sugar cookie. Keep the dough pale and the flavor simple, since the paint and the frosting outline carry the decoration.
Ingredients
- 1/2 cup butter, softened
- 3/4 cup sugar
- 2 eggs, separated
- 1/2 cup sour cream
- 1 tsp vanilla
- 2 1/2 cups flour
- 1 tsp baking powder
- 1/2 tsp baking soda
- For the paint: reserved egg whites, 2 tsp water, food coloring
- For the buttercream outline: 2 Tbsp butter, softened, 1 cup powdered sugar, 1 tsp vanilla, 2 Tbsp milk
Steps
- Cream the softened butter and sugar together using a stand mixer.
- Separate the eggs and save the whites for the paint. Add just the yolks into the mixing bowl along with the sour cream, vanilla, flour, baking powder, and baking soda, and mix thoroughly.
- Chill the dough in the fridge for 30 minutes to 1 hour so it is easier to handle. You can skip this, but the dough will be more sticky.
- While the dough is chilling, preheat the oven to 350 degrees.
- Use a sifter or strainer to dust a layer of flour on a flat surface. Roll out the dough, dusting more flour onto the dough if needed, until it is about 1/8 inch thick. Cut out shapes with cookie cutters, then gently transfer the cut-out cookies to a greased baking sheet.
- Now for the painting. Use a whisk or fork to mix the egg whites with the water in a small bowl, and add food coloring a little at a time until you reach the color you like. If bubbles cover the top of the egg wash mixture after stirring, skim them off with a spoon.
- Use a silicone brush or a clean paintbrush to paint the unbaked cookies with the colored egg wash.
- Bake the cookies at 350 degrees for 10 minutes, or until they are just starting to turn golden brown around the edges.
- Let the painted cookies cool on the pan for a minute or two before transferring them to a wire rack to cool completely.
- While the cookies are cooling, make the vanilla buttercream frosting. Beat the frosting ingredients together in a mixing bowl, transfer the frosting to a piping bag fitted with a small round tip, and pipe an outline or design on the painted sugar cookies.
One cookie works out to about 115 calories, using the Small Town Scratch nutrition figure for this exact recipe. The figure covers one cookie with the egg wash paint and the buttercream outline as listed on the source recipe card.
How to make the edible paint
Whisk the two reserved egg whites with 2 teaspoons of water in a small bowl. Divide the wash between small bowls, one per color, and add food coloring a little at a time. Gel coloring gives stronger color with fewer drops, while liquid coloring works if you add it slowly.
Skim off any bubbles with a spoon before you paint. Bubbles leave pale spots on the cookie where the color does not reach the dough. Paint with a light touch, since a soaked brush floods the surface and the color runs past the edges.
Four edible paints compared
All four paints are safe to eat, but they behave differently on the cookie. Pick by finish and drying time, not by color alone.
Egg white wash paint
This is the lead paint in the recipe above. Egg whites thinned with a little water carry the color, and the oven sets it as the cookies bake. The finish looks like a watercolor, soft at the edges, and the color lightens slightly in the heat.
Use it when children are painting, since there is no hot icing and no waiting for a base to dry. Paint the cookies right after cutting them out, and bake them straight away.
Thin icing paint
Jamie Cooks It Up mixes a thin icing from powdered sugar, corn syrup, lemon juice, and milk, then colors it and pours it into squeeze bottles. A thicker border icing goes on first, so the thin paint stays inside the edge instead of running off the sides.
The border sets in about 15 minutes, and the paint sets in about 1 hour. This method suits a group, since each child gets a bottle and the colors stay separate. Older kids can pipe their own borders, while an adult can do it ahead for younger ones.
Extract flavor paint
Love From The Oven uses McCormick Flavor Paints, vanilla or lemon extract mixed with food coloring. The cookies are dipped in melted white frosting first, which dries into a smooth surface to paint on. The frosting base dries in about 10 minutes, though some frostings take longer.
The color here is the brightest of the four, and the paint smells like vanilla or lemon. Seven holiday colors have exact formulas, such as Holly Berry from vanilla extract and red food color, and Evergreen from lemon extract and green food color.
Condensed milk paint
24HourFamily mixes one 14 ounce can of sweetened condensed milk with gel food coloring, divided between small bowls. Prep takes 5 minutes, and the paint works on cooled sugar cookies, marshmallows, crispy rice treats, and pretzel rods.
This paint stays soft or tacky, so it suits treats eaten the same day and cookies that will not be stacked. Gel coloring works best here, since liquid coloring can make the mix runny and likely to soak into the cookie.
Food coloring safety
Use only products clearly labeled as food color or dye. Never use craft acrylics, tempera, or watercolors on anything that will be eaten, and keep food brushes separate from craft brushes. A label that says non-toxic does not mean a product is safe to eat.
The FDA color additives questions and answers page explains that color additives are safe when used in line with FDA rules, and that every color additive must be approved before it can be used in food. Check the label of any coloring you buy, and skip products that do not name a food color.
Which cookies to paint
Paint on flat, pale, firm cookies. Cut-out sugar cookies are the best choice, since the flat top holds paint and the pale dough lets colors show. Roll the dough to about 1/8 inch thick for the lead recipe, or 1/4 inch for a sturdier cookie that small hands can grip.
Chill the dough before rolling so the shapes hold their edges. Warm dough spreads in the oven, and a spread cookie loses the shape you painted. If the dough softens while you work, slide the tray into the fridge for 10 minutes before baking.
Skip cookies with a dark or rough surface. Chocolate cookies hide the paint, and oatmeal cookies give the brush nothing smooth to work on. Butter cookies from a cookie press work as a second batch, since they bake into neat shapes, but paint them after baking with icing paint, not egg wash.
How to paint Christmas cookies step by step
Set up before the cookies come out of the oven, so the painting starts while everyone is still keen. Cover the table, lay out the palette, and give each painter their own brush and water cup.
Bake and cool the cookies
Bake the cookies and let them cool completely if you are using icing paint or extract paint. Warm cookies melt icing and make condensed milk paint run. Egg wash paint is the exception, since it goes on before baking.
Move cooled cookies to a wire rack or a sheet of wax paper in a single layer. Stacking warm cookies sticks them together and smears the paint.
Mix your palette
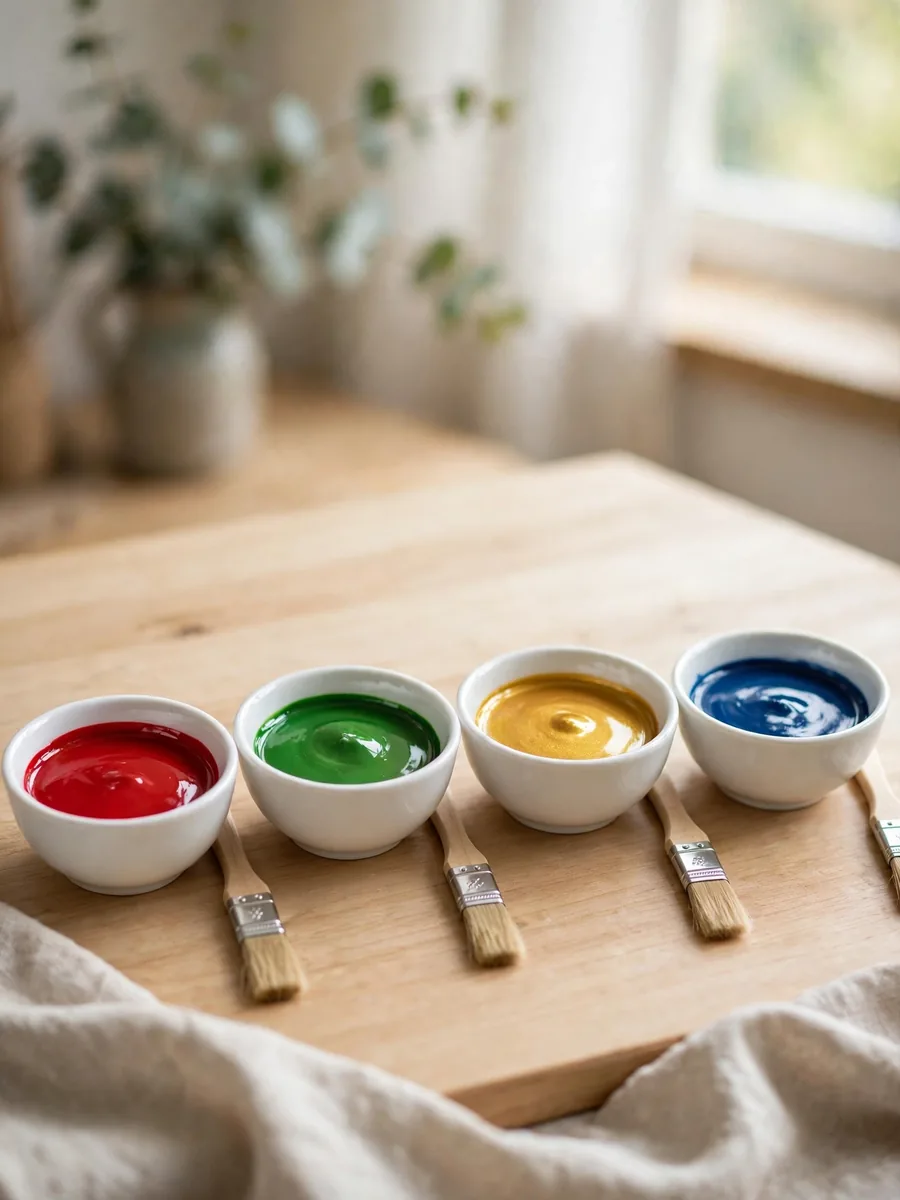
Mix four or five colors to start, not ten. Red, green, gold, white, and brown cover most Christmas designs, and children mix the rest themselves. Add color one drop at a time, since gel coloring turns dark fast.
Give every color its own bowl and its own brush or spoon. Shared brushes muddy the palette, and one dip of a red brush into the green bowl ruins both colors.
Paint in layers
Paint the lightest color first, then add darker colors on top. Let one color dry slightly before painting the next one beside it, or the edges bleed together. ThatsNerdalicious gives the same advice for egg yolk paint.
Work from the center of the cookie outward, and keep the brush fairly dry. Dab extra paint off on a folded paper towel before the brush touches the cookie. A light touch gives cleaner lines than a loaded brush.
Let them dry
Drying time depends on the paint. Egg wash paint sets in the oven, so there is nothing to wait for. Thin icing paint sets in about 1 hour. A royal icing base needs up to 24 hours to harden fully, so paint on it only when it feels smooth and hard.
Leave painted cookies in a single layer at room temperature, uncovered, until the surface feels dry to a light touch. Do not stack them, cover them with plastic wrap, or put them in the fridge while they dry, since trapped moisture softens the surface.
Christmas designs by skill level
Start with shapes that forgive a wobbly line. A tree is a green triangle with dots, and a snowman is three white circles with a carrot nose. Simple shapes look good even when the paint is uneven.
Painting is a good fit when piping feels too fussy. A brush forgives a wobbly hand, and a simple tree or snowflake still looks good. Our decorated cookies roundup has more ideas if you want to compare decorating styles, but painting needs the least equipment of any of them.
Beginner designs
Try dots, stripes, and stars. Paint a red stocking with a white cuff, a green tree with gold dots, or a candy cane with red stripes on white. Use a toothpick to drag dots into swirls, and let the cookie shape do the work.
Cookie cutters in Christmas shapes make the design for you. A star cutter painted gold, a tree cutter painted green, and a round cutter painted like an ornament cover a whole plate with three colors.
Intermediate designs
Try a snowman face, a wreath, or a present with a bow. Pipe a thin icing border first, flood the inside with thin icing paint, then add details with a toothpick while the paint is still wet. A wreath is a green ring with red dots, and a present is a square with crossed lines.
Layer two colors for depth. Paint a blue wash first and let it set, then add white snowflakes on top. The second layer reads clearly only when the first one has dried slightly, so wait a few minutes between layers.
Confident painters
Try a winter scene, a Santa face, or a reindeer with antlers. Paint the background first in a pale wash, add the main shape next, and finish with fine lines from a thin brush or a toothpick. Keep the palette small, since three colors used well beat six colors fighting each other.
For a Santa cookie, paint the hat red, the face a pale wash, and the beard white, then add two dark dots for eyes. Our decorating cakes and cookies guide has more detailed decorating ideas if you want to practice faces and characters on a bigger surface first.
A kid-friendly painting station
Give each child a tray, a brush, and four colors. Cover the table with a plastic cloth or wax paper, and dress children in old shirts or smocks, since food coloring stains fabric.
Children aged 3 to 5 do best with the condensed milk paint or the egg wash paint, since both forgive a heavy hand. Jamie Cooks It Up found the activity held grandchildren aged 3 to 5 for hours, with an adult piping the borders first.
Keep the rules short: one brush per color, rinse between colors, and eat only the finished cookies. Put only a spoonful of each color on the tray, and discard any paint that has been licked or touched by fingers. Our fun decorated cookies make another good project for the same age group, since the shapes are simple and the decorating is quick.
Troubleshooting
Most painting problems come from too much liquid, too much paint, or too little drying time. Fix them in small steps.
Paint runs or bleeds
Too much water or too much paint on the brush is the usual cause. Dab the brush on a paper towel first, and paint thinner layers. For icing paint, pipe a border first so the paint has an edge to stop at.
Colors look pale
Pale color usually means too little coloring or too much water. Add gel coloring one drop at a time, and stir well before you judge the shade. Remember that egg wash paint lightens slightly during baking, so mix it a shade darker than you want.
Paint smudges after drying
Smudging means the paint was not dry yet, or the cookies were stacked too soon. Let icing paint set for about 1 hour, and royal icing paint for up to 24 hours, before stacking or packing. Condensed milk paint may stay tacky, so serve those cookies the same day instead of packing them.
Cookies spread in the oven
Spreading means the dough was too warm or too thin in places. Chill the cut cookies on the tray for 10 to 30 minutes before baking, and roll the dough to an even thickness. ThatsNerdalicious notes the same fix for its painted cookies, and it works here too.
How to store painted cookies
Storage depends on the paint. Egg wash and icing painted cookies keep well, while condensed milk painted cookies do not. Store painted cookies only after the paint feels dry to a light touch.
Place egg wash or icing painted cookies in an airtight container at room temperature for up to 1 week, following Small Town Scratch. Layer them with wax paper between layers so the designs do not stick together. Freeze undecorated or fully dried painted cookies for up to 3 months, and thaw them uncovered at room temperature.

What to serve with painted cookies
Painted cookies suit a cookie exchange, a school party, or a plate for Santa. Put them beside plain cookies so guests can choose.
Pair them with hot cocoa, spiced cider, or milk, and keep the drinks away from the painting table until the cookies are dry. Snowball cookies sit well on the same plate, since their white powdered sugar coating contrasts with the bright painted designs.
Frequently asked questions
How long does edible paint take to dry on cookies?
It depends on the paint. Egg wash paint sets in the oven as the cookies bake. Thin icing paint sets in about 1 hour. A royal icing base needs up to 24 hours to harden fully before you paint on it. Condensed milk paint stays soft or tacky, so serve those cookies the same day.
Can kids paint cookies safely?
Yes. Paint with food-only brushes, use paint made only from food ingredients, and keep an adult supervising. Children aged 3 to 5 do best with the condensed milk paint or the egg wash paint, since both forgive a heavy hand. Give each child a tray, a brush, and four colors.
Can you paint cookies before baking?
Yes, for egg wash and egg yolk paints. Paint them on the raw cookies and the oven sets the color as they bake. Icing paints and extract paints go on after the cookies are baked and fully cooled, or onto a dried frosting or royal icing base.
How do you stop paint colors from bleeding into each other?
Let one color dry slightly before painting the next one beside it, and keep the brush fairly dry by dabbing extra paint off on a paper towel. For icing paint, pipe a thicker border first so the thin paint stays inside the edge.