Skip to content


Apple pie with canned filling starts with two cans of apple pie filling, doctored with cinnamon, nutmeg, lemon juice, and vanilla, spooned into a store-bought crust. It bakes at 425 degrees for 20 minutes, then at 375 degrees for 35 to 40 minutes. Prep takes about 10 minutes, the bake takes about an hour, plus 2 hours to cool.
This is the shortcut version of apple pie, and it makes no apology for that. There is no peeling, no coring, and no dough to make. The filling comes ready from the can, the crust comes ready from the fridge, and the work you do is the small set of fixes that make the canned filling taste like you made it yourself.
That is the whole promise of this article. You will learn which can to buy, how to doctor the filling, which crust to pick, how long to bake, and how to fix a soggy bottom.
What this shortcut pie is
This pie uses canned apple pie filling and a store-bought crust, and nothing in it is made from fresh apples. The filling is already cooked in the can, so the oven only has to bake the crust and heat the filling through. That is why the prep is 10 minutes instead of 45.
The from-scratch version on this site is a different pie for a different day. Our how to make apple pie from scratch starts with fresh apples and a homemade all-butter double crust, takes 45 minutes of hands-on work, and needs 3 hours to cool. If you want to peel apples and make your own filling, use that recipe. If you want pie tonight with a can from the pantry, stay here.
One warning up front: canned filling tastes flat straight from the can. It is sweet, soft, and short on spice. The fixes in this article take about two minutes and change the result more than any other step.
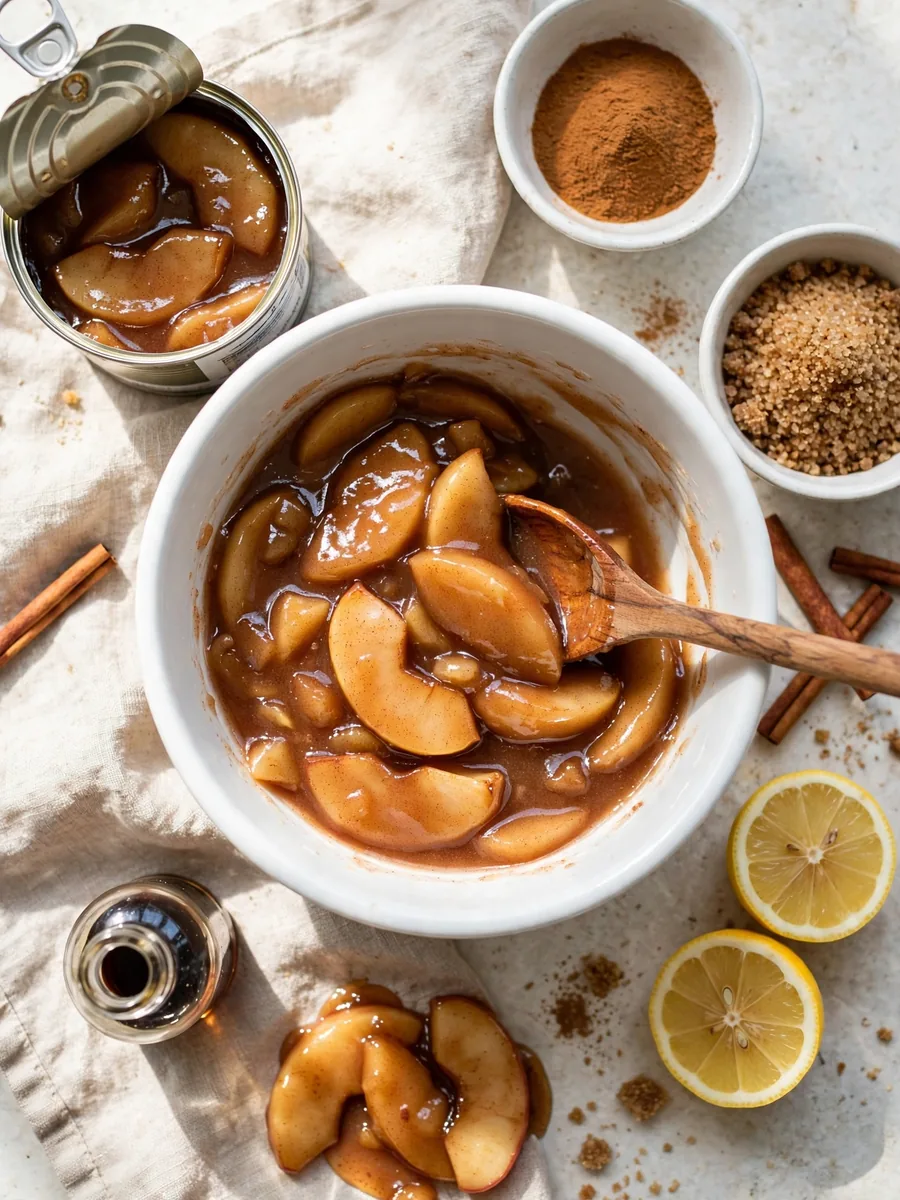
Which canned filling to buy
Most cans hold 20 or 21 ounces, and two cans fill a standard 9-inch pie. A 9-inch plate holds about 40 to 42 ounces of filling, so one can leaves the pie flat and three cans overflow. Buy two cans of the same brand, so the flavor and thickness match.
| Filling | Calories per serving | What to know |
|---|---|---|
| Duncan Hines Comstock More Fruit | 100 per 1/3 cup (89 g) | Most fruit, the usual pick |
| Duncan Hines Comstock Original Country Apple | 100 per 1/2 cup (89 g) | Less fruit, high fructose corn syrup |
| Store brand, Target or Aldi | About 90 to 100 per 1/3 cup | Cheaper, works well |
| No sugar added apple filling | 30 to 35 per 1/3 cup (85 g) | Sucralose sweetened, add brown sugar and spice |
Check the sweetener too. Sula and Spice advises looking for cans with no high fructose corn syrup, and she found every brand she tried worked in the pie. The no sugar added cans save calories but taste thin, so they need the most doctoring.
What to check on the label
Read the label before you buy. Duncan Hines Comstock More Fruit holds about 10 percent more fruit than the original country apple version, and that extra fruit is the main reason it is the usual pick. Midwestern HomeLife names it first, with Target and Aldi store brands as good backups.
Open both cans and look at the filling before you stir anything in. Good filling has visible apple slices in a thick syrup. If the syrup looks watery, add the cornstarch in the recipe below.
If you can your own filling
Home-canned filling works the same way in this recipe. One quart jar fills a 9-inch pie, the same as two store cans. The safety rule matters here: use cook-type ClearJel to thicken filling you can at home, not cornstarch or flour, since those break down in the jar. Penn State Extension gives the tested recipe and the water bath times, 25 minutes at sea level and longer at altitude.
Which crust to use
Refrigerated rolled crusts are the easiest, since a box holds two rounds, exactly what a double-crust pie needs. Frozen crusts already in disposable pans are thicker and hold more filling, and a homemade crust is an option if you already make one.
| Crust | Fit | What to watch |
|---|---|---|
| Refrigerated rolled, Pillsbury | Two rounds per box, fits a 9-inch plate | Let it sit out a few minutes so it unrolls without cracking |
| Frozen deep dish, Pillsbury | Extra depth, holds more filling | Thaw in the fridge until flexible, then roll gently |
| Frozen crust in a disposable pan | Already shaped, no rolling for the bottom | Thicker than rolled dough, thaw only until flexible |
| Homemade all-butter crust | Best flavor, most work | Chill the dough well, since warm dough shrinks in the oven |
Pillsbury is the brand named most often in the recipes behind this article, and Aldi crusts get good results too, though they run thinner. A thin crust browns faster, so check it at 30 minutes and cover the rim with foil if it darkens early.
Use a metal or glass pie plate, not ceramic. Metal browns the bottom faster, and glass lets you see whether the bottom is done. Set the plate on a baking sheet, since canned filling bubbles over more readily than fresh apple filling.
How to doctor canned apple pie filling
Doctoring is the step that makes the pie taste homemade, and it takes two minutes. Tip both cans into a large bowl, then stir in the six upgrades below. Taste the filling before it goes into the crust, since this is the only moment you can still fix it.
- Cinnamon and nutmeg: 1 teaspoon of cinnamon and 1/4 teaspoon of nutmeg, stirred until even. Canned filling is under-spiced by design, and the extra cinnamon is the flavor most tasters notice first.
- Lemon juice: 1 tablespoon of fresh lemon juice. Canned apples lose their bright edge in processing, and the lemon brings it back. The pie will not taste lemony, it will taste more like apple.
- Vanilla: 1 teaspoon of vanilla extract. It rounds out the sweetness and covers the flat canned note.
- Brown sugar: 2 tablespoons, for a caramel note.
- Cornstarch: 2 tablespoons, to thicken the syrup so the slices hold when cut. Stir it into the brown sugar first, then into the filling, so it does not clump. Midwestern HomeLife uses 1 tablespoon of each per 20-ounce can, the same ratio.
- Butter: 2 tablespoons of cold butter, dotted over the filling once it is in the crust. It melts into the syrup and adds richness that canned filling lacks. A tiny pinch of cayenne, as Midwestern HomeLife suggests, adds depth without heat.
Two optional upgrades
Fresh apple slices add texture. Stir in 1 cup of thinly sliced Granny Smith apple if your canned slices are soft. The fresh slices stay firmer in the bake and give the filling something to bite into. Sula and Spice builds her whole pie this way, with 3 fresh apples to one can of filling.
Caramel adds a second flavor. Drizzle 2 to 3 tablespoons of caramel sauce over the filling before you add the top crust, or serve it over the baked slices. Use it sparingly, since the filling is already sweet.
Apple pie with canned filling
This is the lead recipe: two cans of filling, two refrigerated crusts, and the six doctoring steps above. The filling is stirred, not cooked.
Prep time: 10 minutes
Cook time: 1 hour
Serves: 8
Ingredients
- 2 cans (21 oz each) apple pie filling
- 2 refrigerated pie crusts (1 box, 2 rounds)
- 1 teaspoon ground cinnamon
- 1/4 teaspoon ground nutmeg
- 1 tablespoon lemon juice
- 1 teaspoon vanilla extract
- 2 tablespoons brown sugar
- 2 tablespoons cornstarch
- 2 tablespoons cold unsalted butter, cut into small pieces
- 1 large egg, beaten with 1 tablespoon milk
- 1 tablespoon coarse sugar, optional
Steps
- Heat the oven to 425 degrees. Fit one crust into a 9-inch metal or glass pie plate, leaving about 1 inch of overhang, and chill it in the fridge while you mix the filling.
- Tip both cans of filling into a large bowl. Stir in the cinnamon, nutmeg, lemon juice, and vanilla.
- Stir the brown sugar and cornstarch together in a small bowl, then stir the mixture into the filling until no white streaks remain.
- Spoon the filling into the chilled bottom crust and spread it into an even layer. Dot the top with the butter pieces.
- Lay the second crust over the filling, trim the edges to a half inch, fold the top edge under the bottom edge, and crimp. Cut 4 to 5 slits for steam, or weave a lattice top using the method in the next section.
- Brush the top lightly with egg wash and sprinkle with coarse sugar if you like. Set the pie on a baking sheet on the lowest rack.
- Bake at 425 degrees for 20 minutes, then lower the oven to 375 degrees and bake 35 to 40 minutes more, until the crust is deep golden and the filling bubbles through the vents.
- Cool on a wire rack for at least 2 hours before slicing, so the filling sets and the slices hold.
One slice works out to about 430 calories, counted from USDA FoodData Central values for the filling, crusts, sugar, cornstarch, butter, egg, and milk in this recipe. The full pie comes to about 3442 calories for 8 slices, and the figure is an estimate, not a lab result.
Lattice vs full crust vs crumb topping
The top crust is a choice, not a rule, and each option changes the bake a little. A full top crust is the easiest and the fastest to assemble. A lattice looks the most homemade and lets you see the filling bubble, which is the best doneness cue. A crumb topping is the simplest of all, since there is no second crust to roll.
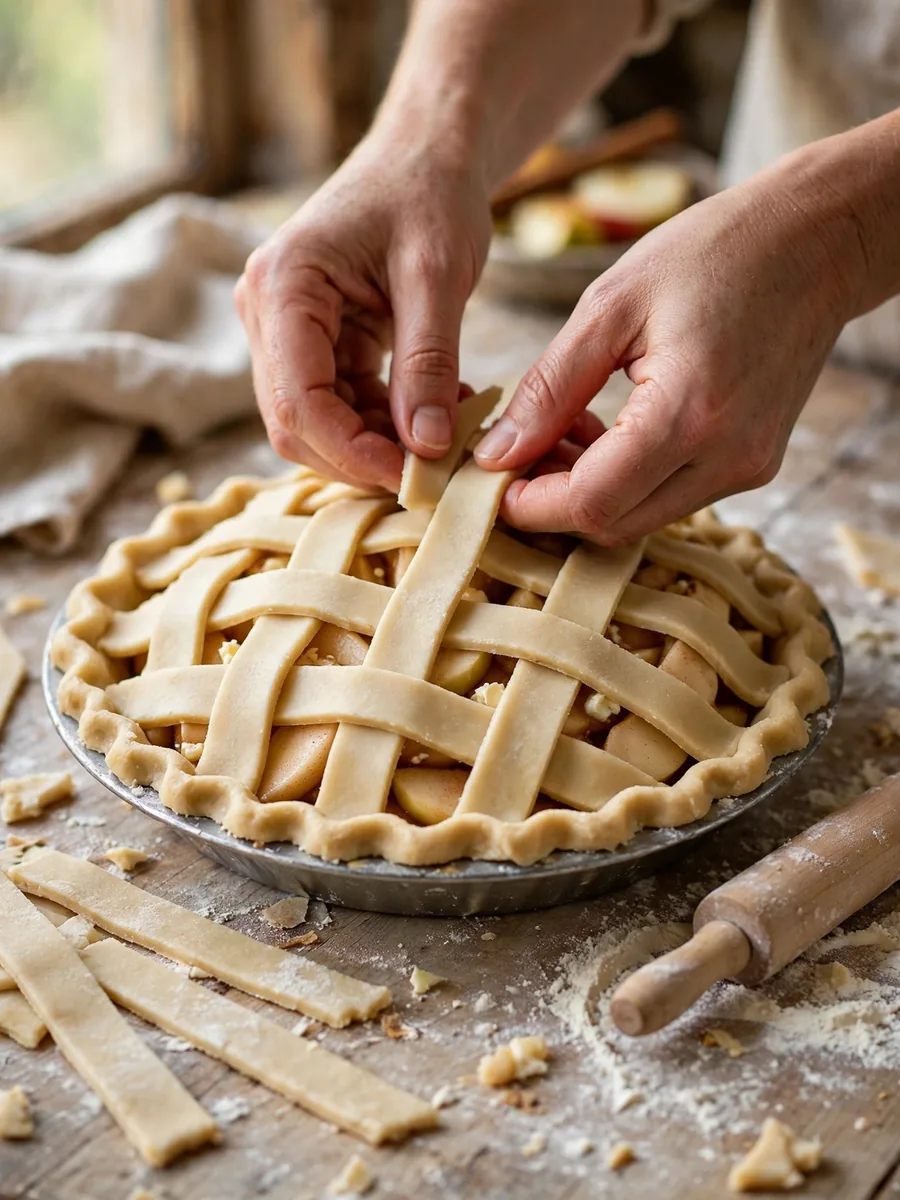
How to weave a lattice
For a lattice, roll the second crust gently, then cut it into 1/2-inch to 3/4-inch strips with a pizza cutter. Lay three strips vertically across the pie, then weave the cross strips over and under, folding the vertical strips back as you go. Tuck the strip ends under the bottom crust and crimp.
Crumb topping
For a crumb topping, mix 3/4 cup flour, 1/2 cup brown sugar, and 1/2 teaspoon cinnamon in a bowl, then cut in 6 tablespoons of cold butter until the mixture holds in clumps. Scatter it over the filling and bake as directed. Sula and Spice uses this topping with her fresh apple and canned filling mix.
How each topping bakes
A lattice bakes a few minutes faster than a full top, since steam escapes through the gaps. A crumb topping browns faster than pastry, so check it at 30 minutes and cover it loosely with foil if it darkens.
Bake time and temperature
The bake time is the one point where the top recipes disagree, and the spread is wide. The filling is already cooked, so the bake is really about the crust: it must turn deep golden on top and brown underneath, while the filling heats through and bubbles.
| Source | Method | Total assembled bake |
|---|---|---|
| This recipe | 425 degrees 20 min, then 375 degrees 35 to 40 min | 55 to 60 minutes |
| The Country Cook | 425 degrees 20 min, then 375 degrees 20 to 25 min | 40 to 45 minutes |
| Sula and Spice | Covered 30 min at 425 degrees, then uncovered 25 min at 375 degrees | 55 minutes |
| Caramel and Spice | 355 degrees throughout | 45 to 55 minutes |
| Midwestern HomeLife | Blind bake about 35 min, then 425 degrees 20 min plus 375 degrees 60 to 70 min | 80 to 90 minutes |
Midwestern HomeLife bakes longest because it blind bakes the bottom crust first and then bakes until the bottom is well browned. The Country Cook bakes shortest, relying on the filling already being cooked. Our 55 to 60 minutes sits in the middle.
Start the pie at 425 degrees on the lowest rack. The hot start sets the crust and drives heat into the bottom, which is the part that stays pale. After 20 minutes, lower the oven to 375 degrees so the top finishes without burning.
How to tell when the pie is done
Look for three signs together: a deep golden brown top crust, filling actively bubbling through the vents or lattice, and a bottom crust that looks brown through a glass dish. One sign alone is not enough, since a brown top can hide a pale bottom.
Do not judge the pie by the clock alone. Ovens run hot or cool, thin crusts brown faster than thick ones, and a deep dish pie needs more time than a standard one. Trust the bubbling more than the timer.
How to fix a soggy bottom
A soggy bottom is the most common complaint with canned filling pies, and it has a clear cause. Canned filling is wetter than fresh apple filling, so the bottom crust steams instead of baking. Fix the moisture and the heat, and the bottom crisps like the top.
Blind bake first
Blind baking is the strongest fix. Line the bottom crust with foil, fill it with pie weights or dried beans, and bake at 375 degrees for 25 minutes, then 8 to 10 minutes more without the foil, until light golden. Midwestern HomeLife tested her pie without blind baking and found the bottom still doughy after 100 minutes in the oven, which is why she blind bakes every time.
If you skip the blind bake
Skip the blind bake only if you are short on time and you use the other fixes. Brush the inside of the bottom crust with a thin layer of egg wash, which forms a barrier between the dough and the wet filling.
Do not let the wash pool in the bottom, or it stays wet. Preheat a baking sheet on the lowest rack and set the pie on it, so the bottom gets heat from the first minute. Use a metal dish if your bottoms always come out pale, and bake the full time, even if the top looks done early.
Troubleshooting
Most canned filling pie problems show up before the pie cools. The table covers the ones readers report most often.
| Problem | Cause | Prevention and fix |
|---|---|---|
| Runny filling | Too little thickener, cut too soon | Add 2 tablespoons cornstarch, bake until bubbling, cool 2 hours |
| Soggy bottom | Wet filling, cool oven floor | Blind bake, egg wash barrier, hot baking sheet, lowest rack |
| Burnt edges | Edges cook faster than the center | Foil ring or pie shield after 30 minutes |
| Pale top crust | No egg wash, oven too cool | Egg wash and coarse sugar, bake until deep golden |
| Filling bubbles over | Too much filling, thin crust | Use 2 cans only, bake on a sheet, leave headroom at the rim |
| Slices fall apart | Cut while warm | Cool at least 2 hours, overnight in the fridge is better |
| Filling tastes flat | Canned spice faded | Add cinnamon, nutmeg, lemon juice, and vanilla before baking |
| Top crust cracks | Dough dried out, too few vents | Cut 4 to 5 slits, keep dough covered while you work |
Make ahead, storage, and freezing
This pie is a good make-ahead dessert, since it needs 2 hours to cool anyway. Bake it in the morning or the day before, let it cool fully, and reheat slices before serving.
| Stage | Storage | How long |
|---|---|---|
| Unbaked assembled pie | Freezer, wrapped | Up to 3 months, bake from frozen with 20 to 25 extra minutes |
| Baked pie | Room temperature, loosely covered | Up to 2 days |
| Baked pie | Refrigerator, covered | Up to 4 more days |
| Baked pie | Freezer, wrapped | Up to 3 months, thaw overnight in the fridge |
How long it keeps and how to reheat
Midwestern HomeLife keeps the baked pie in the fridge for about a week, tightly covered, while The Country Cook gives 4 days. Use 4 days as the safe number for the fridge, and freeze the rest if you will not eat it in time.
Reheat slices in a 350 degree oven for 10 to 15 minutes, which re-crisps the crust. The microwave warms the filling but softens the crust, so use it only in short bursts.
Do not freeze the filling on its own after opening the cans. Once a can is open, use the filling the same day, or keep leftovers in the fridge for a day as a dessert topping.
Scaling the recipe
The recipe scales cleanly, since the filling is already portioned by the can. Keep the doctoring amounts per can the same as in the lead recipe.
Mini pies are the single-serving version. Cut refrigerated crust into rounds, press them into a muffin pan, and spoon in 2 to 3 tablespoons of doctored filling per cup. Bake at 375 degrees for about 25 minutes, until golden and bubbling. One can makes about 12 mini pies, and they cool in 30 minutes.
A half pie uses one can of filling, one crust in a 6-inch dish, and about 40 minutes in the oven. A deep dish pie uses two cans plus a cup of fresh apple slices for height, and needs 10 to 15 extra minutes. A slab pie for a crowd doubles the recipe in a sheet pan and bakes about 50 minutes.
What to serve with apple pie
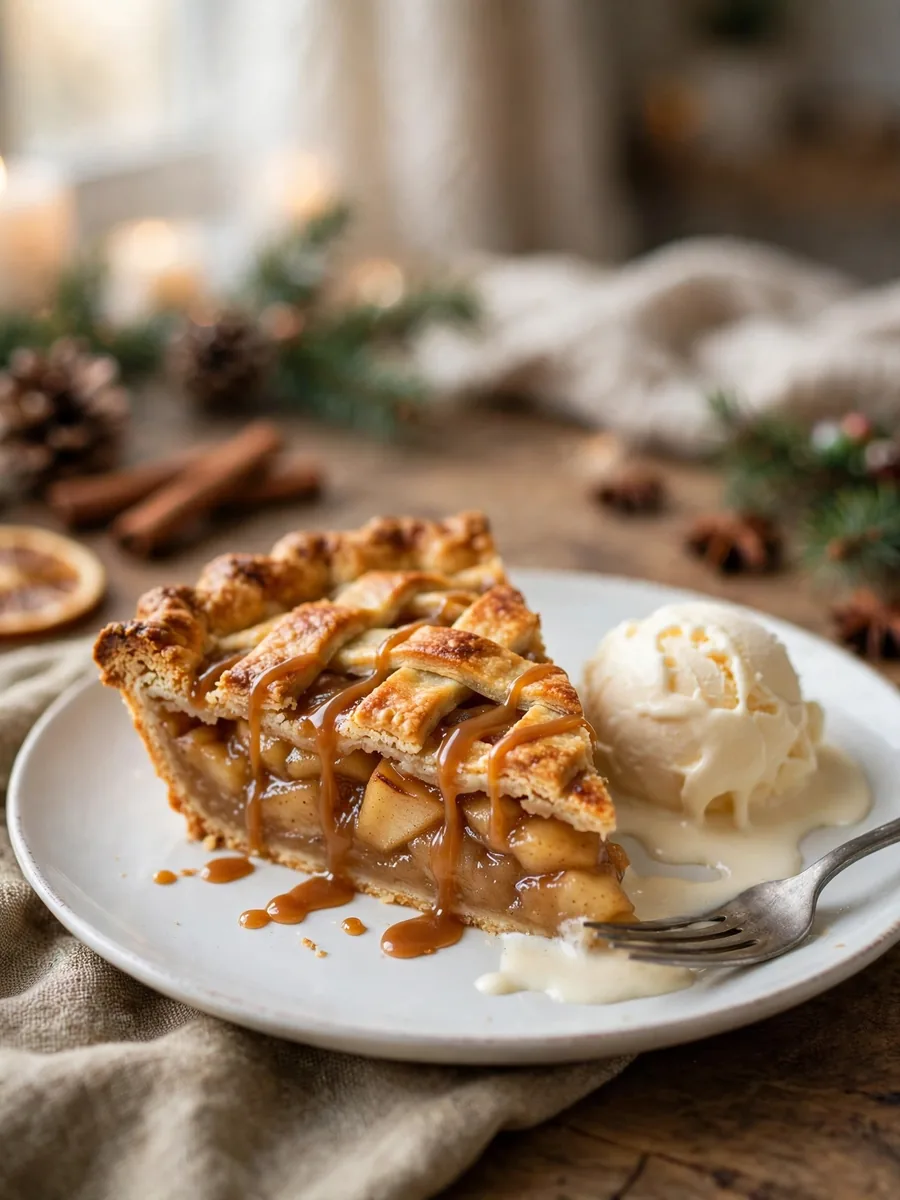
Serve the pie warm or at room temperature, never hot from the oven, since the filling needs to set. Vanilla ice cream is the classic partner, and it melts into the warm filling. Whipped cream is lighter, and salted caramel drizzle suits a holiday table.
For a holiday table, our Libby’s pumpkin pie recipe sits next to this one, and the two pies cover the classic fall desserts between them. If the party needs a cake as well, classic bakes like a doberge cake give the table a layered centerpiece.
For a simpler bake the same week, our easy baking with pantry staples uses one bowl and the bananas already on the counter. And if the meal before dessert needs bread, our homemade bread recipe bakes a loaf that suits the table without adding another dessert to the menu.
Frequently asked questions
How long do I bake apple pie with canned filling?
About 55 to 60 minutes in total: 20 minutes at 425 degrees, then 35 to 40 minutes at 375 degrees, until the crust is deep golden and the filling bubbles. Times disagree across sources, from 40 to 45 minutes up to 80 to 90 minutes with a blind bake, so judge by the crust and the bubbling, not the clock alone. Cool at least 2 hours before slicing.
How many cans of apple pie filling do I need for a 9-inch pie?
Two 20 or 21 ounce cans, about 40 to 42 ounces total. One can leaves a 9-inch pie flat, and three cans overflow. One quart of home-canned filling also fills a 9-inch pie.
How do you keep the bottom crust from getting soggy?
Blind bake the bottom crust at 375 degrees for about 35 minutes until light golden, or brush the inside with a thin layer of egg wash as a barrier. Bake on a preheated baking sheet on the lowest rack in a metal or glass dish, and bake the full time until the filling bubbles.
Can I make apple pie with canned filling ahead of time?
Yes. Bake it the day before, let it cool fully, and refrigerate it covered for up to 4 days. Reheat slices in a 350 degree oven for 10 to 15 minutes so the crust re-crisps. An unbaked assembled pie freezes for up to 3 months.