
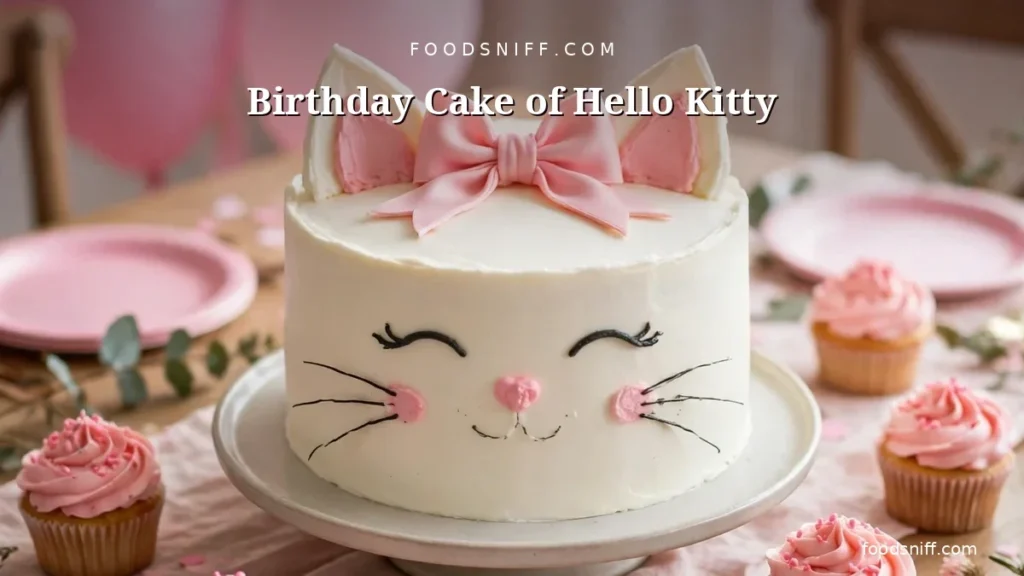
A birthday cake of Hello Kitty is a soft vanilla sponge shaped into the white cat’s round face, with two triangle ears, a pink bow, oval eyes, and a yellow nose in buttercream. Bake two 8 inch round cakes, cut ears from one layer, frost white, and add the details. It takes about 3 hours with cooling.
A Hello Kitty Cake Without the Shaped Pan
Most Hello Kitty cakes online ask you to buy a shaped pan or sculpt fondant for an afternoon. This version skips both. Two ordinary 8 inch round pans, a serrated knife, and four colors of buttercream get you a face anyone recognizes.
Hello Kitty has stayed popular since her debut in 1974, and she still shows up at birthday parties for kids and for adults who grew up with her. Hello Kitty’s official Sanrio page says she loves baking cookies and making new friends, which fits a birthday cake better than most characters do.
Most of those recipes repeat the same two ideas: a shaped pan or a fondant face. This one uses neither.
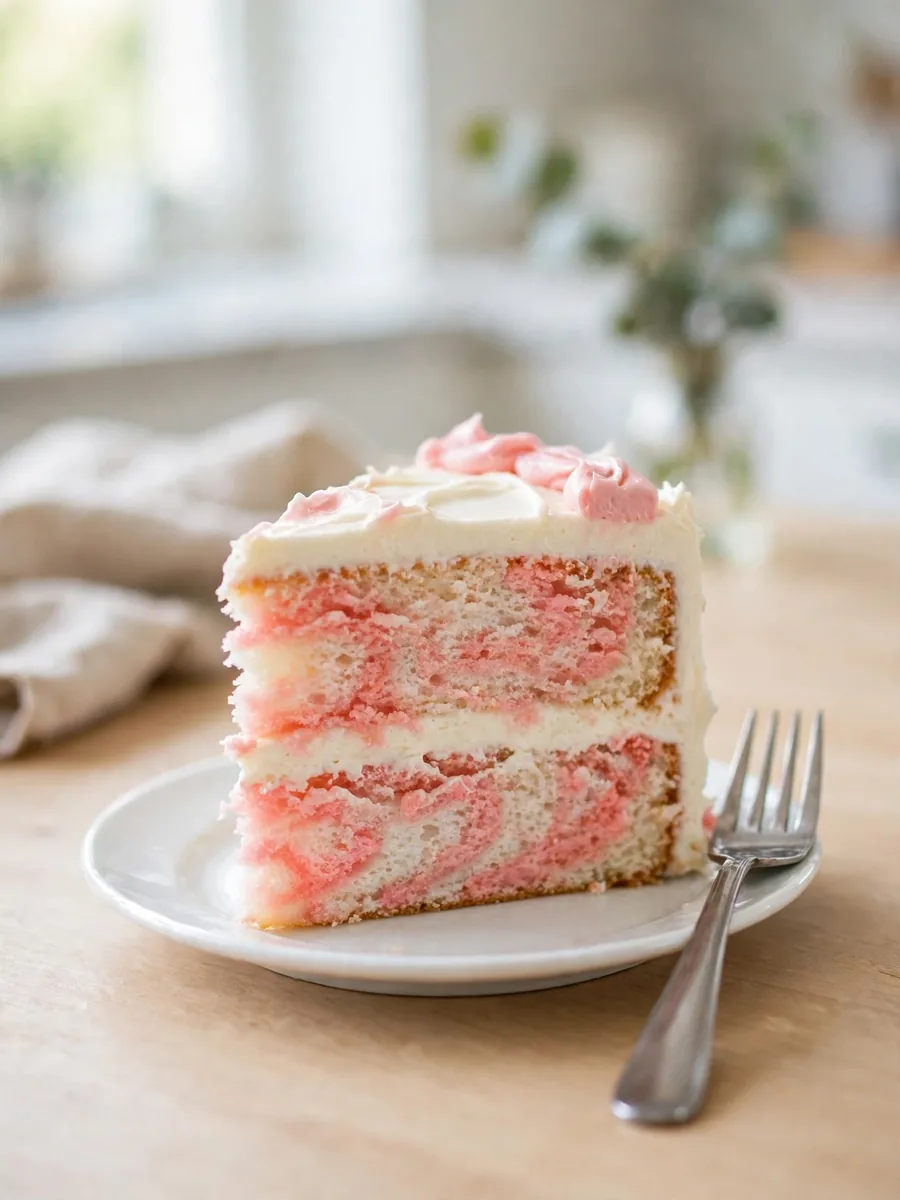
Why This Cake Works Without a Special Pan
A shaped pan costs money, takes up shelf space, and only ever makes one cake. The carving method here uses pans you already own: one round layer becomes the face, and the second gives up two small triangles for ears.
The face itself is forgiving. Hello Kitty is drawn from a few simple shapes, and if your oval is a little wide or your bow sits a touch high, the cake still reads as Hello Kitty.
The face is an oval and two triangles
Round cakes are already close to the right shape. A full round reads as a wide face, and trimming two small triangles from the second layer gives you matching ears. You do not need a steady hand for sculpting, only a knife and a ruler. Measure twice, cut once, and the pieces fit.
The ears attach with a dab of buttercream against the top edge of the face layer, and the crumb coat hides the seam. Nobody at the party will know where one layer ended and the ears began.
Buttercream tastes better than fondant
Fondant gives a smooth, polished finish, and some bakers prefer it for photos. It also tastes like sweetened paste, and most guests peel it off and leave it on the plate. Buttercream tastes like the cake it covers.
This recipe uses buttercream for everything, including the bow, the eyes, and the whiskers. Black decorating gel or melted dark chocolate handles the fine lines. For a smoother finish, chill the frosted cake for 20 minutes and run a warm offset spatula over the top.
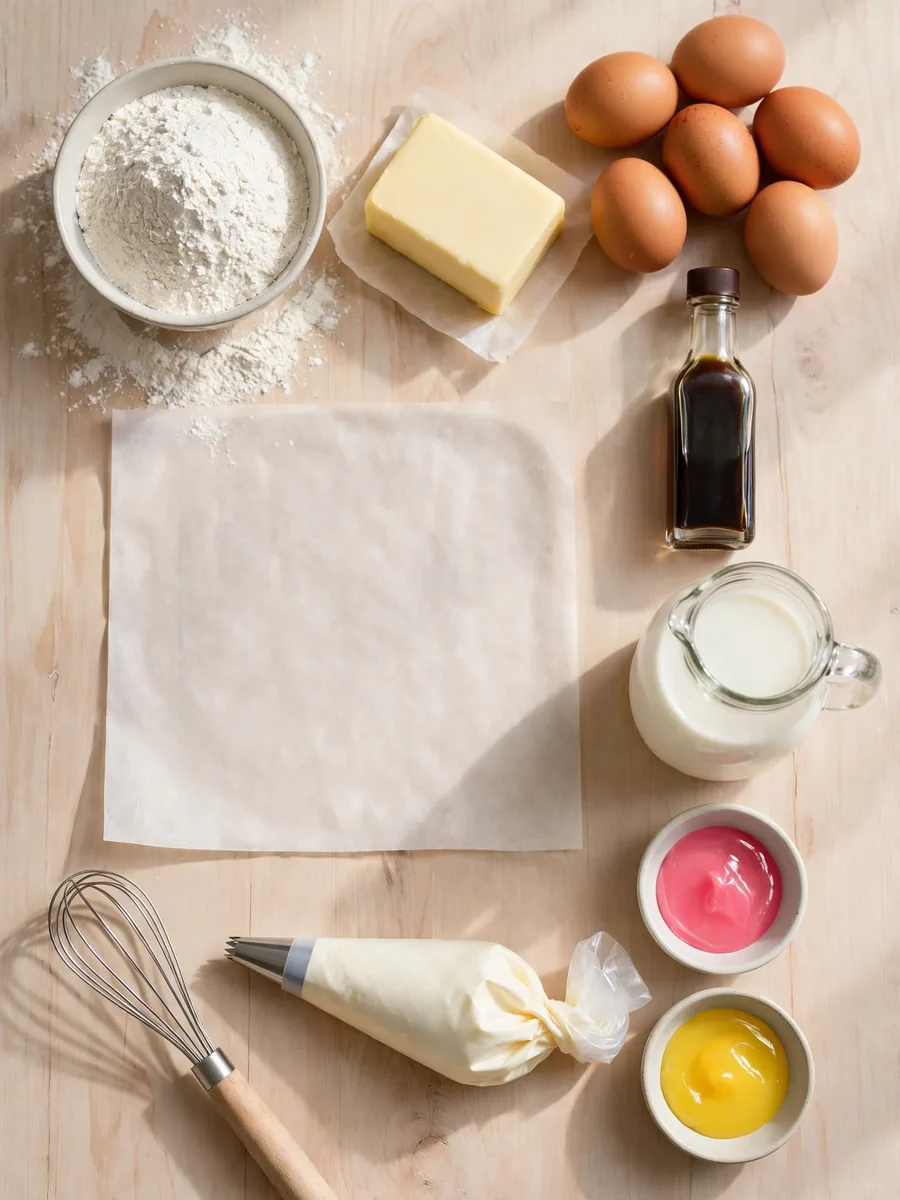
What You Need
For the vanilla sponge
- 2 1/2 cups all-purpose flour
- 2 1/2 teaspoons baking powder
- 1/2 teaspoon salt
- 1 cup unsalted butter, softened to room temperature
- 1 1/2 cups granulated sugar
- 4 large eggs, room temperature
- 1 tablespoon pure vanilla extract
- 1 cup whole milk, room temperature
For the buttercream and the face
- 1 1/2 cups unsalted butter, softened to room temperature
- 5 cups powdered sugar, sifted
- 3 tablespoons heavy cream
- 1 teaspoon pure vanilla extract
- Gel food coloring in pink, yellow, and black
- Black decorating gel or melted dark chocolate, for the eyes and whiskers
Tools that make it easier
- Two 8 inch round cake pans
- Parchment paper
- Electric mixer, stand or hand held
- Offset spatula
- Serrated knife
- Piping bags and a star tip
- Toothpicks, for tracing shapes before piping
- Wire cooling rack
A turntable helps but is not required. Gel food coloring matters more than any tool on this list, since liquid coloring thins buttercream and turns pink into a washed out peach.
How to Bake the Cake
Heat the oven to 350 degrees. Line the bottoms of both pans with parchment and grease the sides lightly. Whisk the flour, baking powder, and salt in a bowl. In a large bowl, beat the butter and sugar for 3 to 4 minutes, until pale and fluffy. Add the eggs one at a time, then mix in the vanilla.
Add the flour mixture and the milk in turns, starting and ending with flour, and mix on low speed just until the streaks disappear. Overmixing builds gluten and turns a light sponge dense, so stop as soon as the batter looks even. Divide it between the pans and bake for 28 to 32 minutes, until a toothpick in the center comes out clean.
Let the layers cool in the pans for 10 minutes, then turn them out onto a wire rack and cool fully to room temperature. Warm cake crumbles under a knife and melts buttercream on contact.
How to Cut the Hello Kitty Face Shape
Set one cooled layer flat on a board. This is the face. Cut two matching triangles from the second layer, each with a 2 inch base and a 2 inch height. Mark each triangle with toothpicks first, then cut along the marks with a long serrated knife.
Place the triangles against the top left and top right of the face layer, points up, and press them in place with a small dab of buttercream. If a triangle wobbles, trim its base flat until it sits steady.
Chill the layers first
Wrap the cooled layers in plastic wrap and chill them for 30 to 45 minutes before carving. Cold cake cuts cleanly, while room temperature sponge tears and leaves a ragged edge that shows through the frosting.
How to Make the Buttercream
Beat the softened butter on high speed for 3 minutes, until smooth and pale. Add the vanilla, then add the powdered sugar one cup at a time on low speed. Pour in the heavy cream and whip on high for 2 minutes, until the frosting looks fluffy and spreads easily.
Set aside about 1 cup of buttercream for the bow and nose. Tint 3/4 cup pink with gel coloring and tint 2 tablespoons yellow. Leave the largest portion white. If the pink looks too pale, add gel one drop at a time. Gel darkens a little as it sits, so stop one shade short of the color you want.
Getting the white actually white
Butter has a natural yellow tint, so white buttercream often comes out cream colored. Beat the butter for a full 5 minutes before adding sugar and the color lightens a lot. A dot of purple gel food coloring, no bigger than a toothpick tip, neutralizes the last of the yellow.
How to Decorate the Face
Spread a thin crumb coat of white buttercream over the whole cake, face and ears, and chill it for 15 to 20 minutes. The crumb coat seals in loose crumbs and gives the final coat something smooth to grip. Then add a generous final layer of white buttercream and smooth it with an offset spatula.
Trace the face details lightly with a toothpick before you pipe anything: the two oval eyes, the small oval nose, three whiskers on each cheek, and the bow near the left ear. Toothpick lines wipe away with a fingertip, while piped gel does not.
The bow
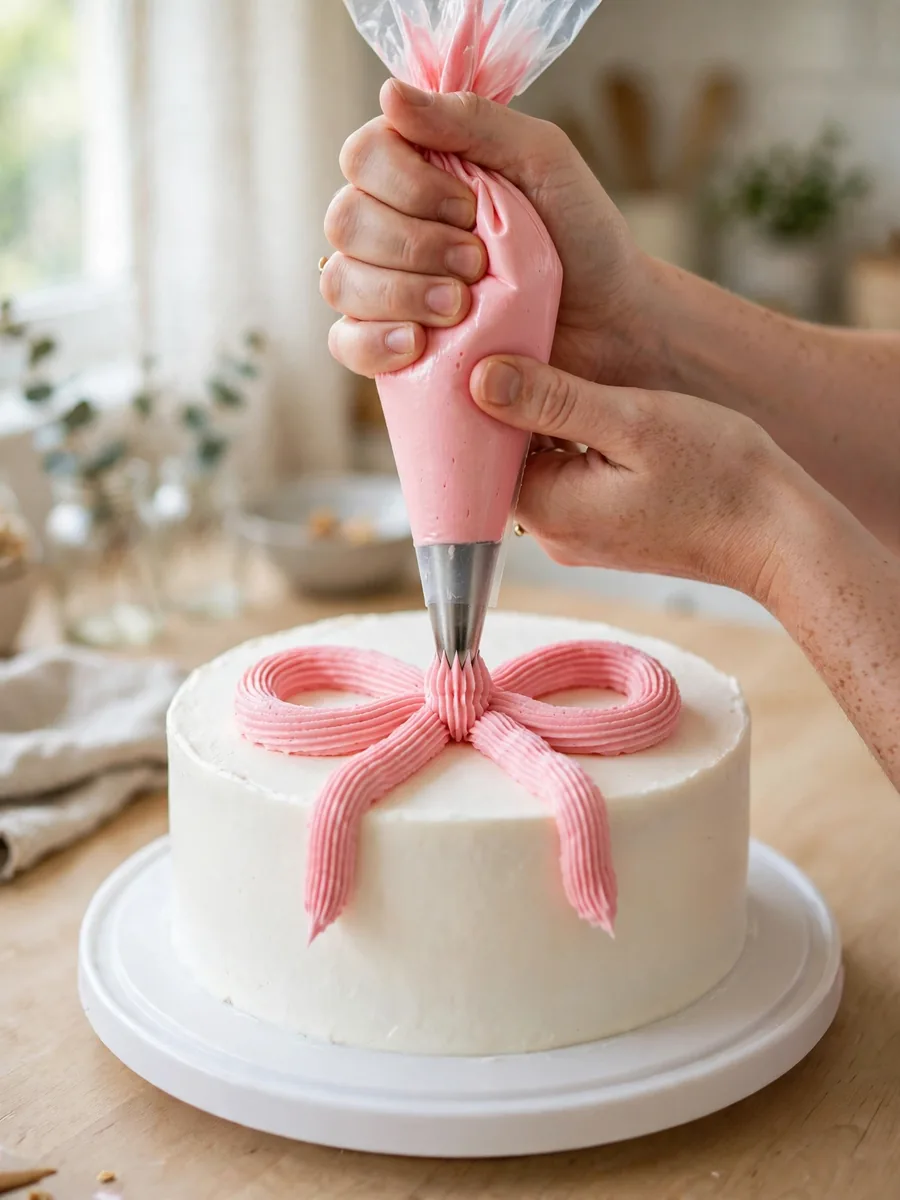
The bow sits on the upper left side, overlapping the left ear slightly. Pipe it with the star tip and pink buttercream. Start with two loops, one on each side, then a small round knot in the middle.
Keep each loop about 2 inches wide so the bow reads clearly from a distance. A bow that is too small gets lost against the white face, and that is the most common mistake in photos of this cake.
Pipe the bow after the final coat has chilled for 10 minutes. Soft frosting lets the star tip sink in and blur the shape, while firm frosting holds the ridges.
Eyes, nose, and whiskers
Pipe the eyes as two tall black ovals, each about 1 inch long, set wide apart in the upper half of the face. The nose is a small yellow oval in the center, just below and between the eyes.
Draw the whiskers last, three on each cheek, with black decorating gel or melted dark chocolate in a small piping bag. Keep them short, about 1 1/2 inches, and angle them slightly upward. Long whiskers droop and cross the eyes.
A piping order that keeps colors clean
Work from light to dark, large shapes to small ones: white base, pink bow, yellow nose, then the black eyes and whiskers last. Black gel bleeds into soft white frosting, so chill the frosted cake for 20 minutes before the black details go on.
Cake Size and Servings
This recipe as written serves 12, using two 8 inch rounds. The same method scales to other pan sizes, but the baking time changes with the pan. Check with a toothpick rather than trusting the clock alone.
| Pan size | Servings | Bake time |
|---|
|—|—|—|
| Two 6 inch rounds | 8 | 24 to 28 minutes |
|---|---|---|
| Two 9 inch rounds | 16 | 30 to 35 minutes |
| 24 cupcakes | 24 | 18 to 20 minutes |
For cupcakes, pipe a small white swirl on each one, add a tiny pink bow and two chocolate whiskers, and you have a tray of mini faces. Kids like having a cake of their own. Fill each cup two thirds full and watch them after 18 minutes.
Flavor Variations That Keep the Look
A chocolate sponge works if vanilla feels too plain, and the white frosting still keeps the face bright. Swap the milk for the same amount of hot coffee to deepen the chocolate flavor. The bow and face details stay exactly the same.
Strawberry is the other easy change. Fold 1/3 cup of freeze dried strawberry powder into the dry ingredients for a pink crumb that matches the bow. Fresh strawberries add moisture and soften the layers, so powder is the safer choice when the cake needs to hold a carved shape.
Lemon is the lightest option and suits a summer party. Add the zest of two lemons to the sugar and rub it in with your fingertips before creaming the butter. The citrus oils perfume the whole cake without changing the texture. Keep the frosting vanilla so the lemon does not fight with the colors.
Make Ahead and Storage
Bake the layers up to two days ahead. Cool them fully, wrap each one tightly in plastic wrap, and keep them at room temperature. Decorate the day of the party or the night before, so the colors stay bright. A finished cake keeps in an airtight container in the fridge for up to 3 days.
Let a refrigerated cake sit at room temperature for 30 minutes before serving so the buttercream softens. Cold buttercream tastes dull and cuts in hard chunks. If the cake has fondant pieces, keep it in its box while it warms up, because fondant sweats as cold cake meets warm air.
Freeze unfrosted layers for up to a month, wrapped tightly in plastic wrap and foil, and thaw overnight in the fridge before decorating. Do not freeze a finished buttercream cake if you can avoid it. It survives, but the colors soften and the frosting can weep as it thaws.
When Something Goes Wrong
- The bow slides off. The frosting underneath was too soft or too warm. Chill the cake for 20 minutes, then pipe the bow again on the firm surface.
- Black gel bleeds into the white frosting. The base coat was still soft when the details went on. Chill the cake before piping black, and use gel or melted chocolate rather than liquid coloring.
- The buttercream looks yellow. Beat the butter longer before adding sugar, and add a toothpick tip of purple gel to cancel the yellow. Butter plus purple gel beats a shortening swap, which changes the flavor.
- An ear cracks while you cut it. Chill the layers longer, and cut with a long serrated knife in slow sawing strokes instead of pressing down. If a crack still happens, buttercream fills it and the crumb coat hides it.
- The sponge comes out dry. Check the oven temperature with a thermometer, since many ovens run hot. Pull the layers at the first clean toothpick.
Serving and Party Ideas
Cutting a shaped cake
A birthday cake of Hello Kitty should be seen whole before it is cut, so bring it out uncut and let everyone look. Then cut from the bottom edge upward in thin slices, so each serving gets some face and some ear.
A shaped cake cuts awkwardly if you start at the top, and the ears are the first thing to fall apart. Serve the slices on small plates with a fork, since the frosting is soft.
What to serve with it
Pair the cake with other party food that matches the theme. These fun novelty bakes bring the same playful energy to the table, and playful decorated cookies give younger guests something to hold while they wait for cake.
For a second, plainer cake on the adults table, these classic celebration cakes bake in the same oven without any decorating at all. And if you want a taller showpiece for a bigger party, a doberge cake with six thin layers makes a fine centerpiece beside it.
Birthday Cake of Hello Kitty FAQ
How far ahead can I bake the cake?
Bake the layers up to two days ahead and keep them wrapped at room temperature, or freeze them for up to a month. Decorate the day of the party or the night before.
Can I use a cake mix instead?
Yes. A vanilla cake mix works well if you are short on time. Bake it in two 8 inch round pans and follow the decorating steps as written.
How do I store the decorated cake?
Keep it in an airtight container in the fridge for up to 3 days. Let it sit at room temperature for 30 minutes before serving so the buttercream softens.
Fondant or buttercream for the face?
Buttercream tastes better and pipes cleanly enough for every detail on this cake. Fondant gives a smoother finish for photos, so use it only if the look matters more to you than the flavor.
Bring It Out While the Bow Is Still Bright
This cake works because the design is simple and the flavor is familiar: vanilla sponge, real buttercream, and a face made from shapes a child could draw. Most guests enjoy that combination, whether they grew up with Hello Kitty or are meeting her for the first time.
Bake the layers a day ahead, decorate in the morning, and bring the cake out when everyone is watching. The pink bow does the rest.